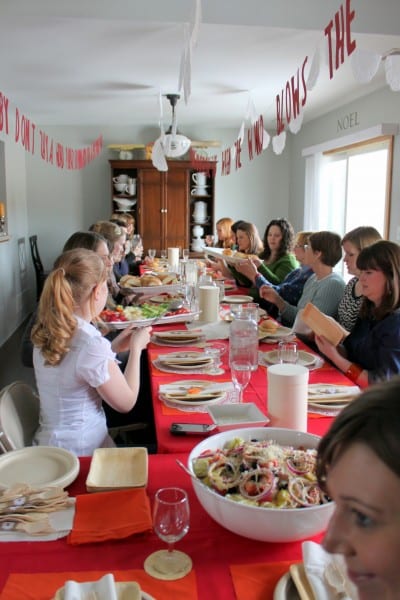
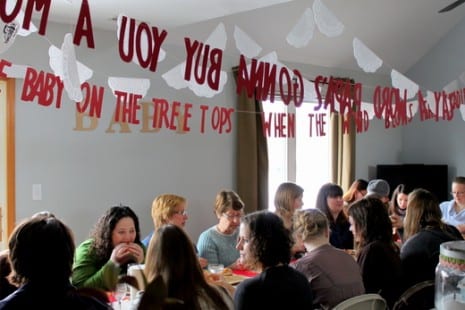
When I saw these letter garlands Chelsea A made for her Modern Meets Vintage Baby Fete, I nearly flipped. I’ve seen many garlands before but never anything like this, and how sweet that the letters spell out lullabies.
I asked Chelsea how she made them and here’s what she said…
The letter garlands were made using my Quickutz Silhouette. I think the letters turned out to be about 6″ each.
I went through about 20-30 pieces of red cardstock to cut out the two different lullabies. I could only fit between 5 and 7 letters per sheet, even with creative arranging. Even with the Silhouette it took about 5 hours to cut everything.
I know it would have taken SO much longer if I did it by hand. Just thinking about tracing everything and THEN cutting it with scissors is making my hand hurt!
But, if someone doesn’t have an extra $200-$225 laying around to shell out for a Silhouette, it’s definitely doable with good old tracing and cutting.
After they were all cut out, I used a big needle and red and white striped bakers twine (but any old string would work – just don’t use a single thread because it would be heartbreaking to have to re-string it or have it break from the weight in the middle of the party) and strung up each letter.
If you’ll notice, some of them are backwards. That wasn’t on purpose originally, but as usual I was running late for set up and said, “oh well! Now it’s going to be on purpose!” and started making some other letters backwards. The charm of handmade, right?
Chelsea, thank you for sharing how you did this. It’s truly original!
Please check out the other clever details at Chelsea’s party including the adorable cupcake favors.


1 comment
Kara @ Nest Candy wrote:
I think this is too adorable. I love how easy it is too! Thanks for sharing!
To leave a comment Log in -or- Join the party