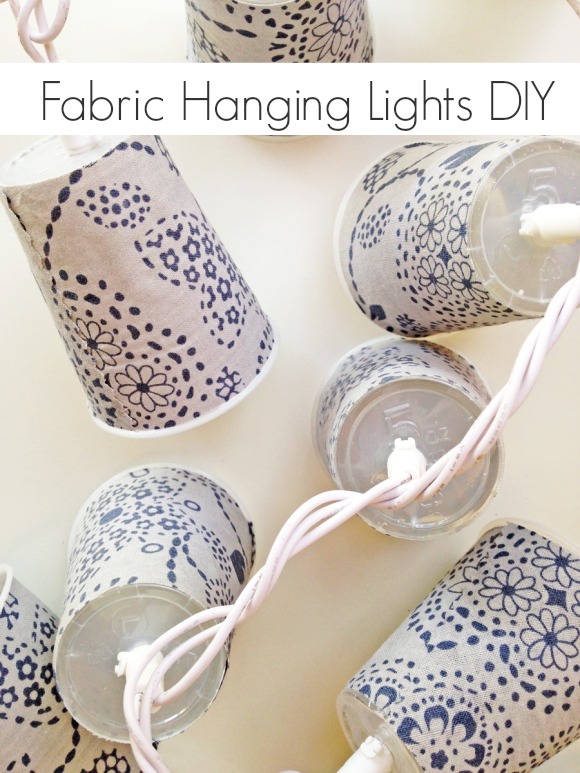
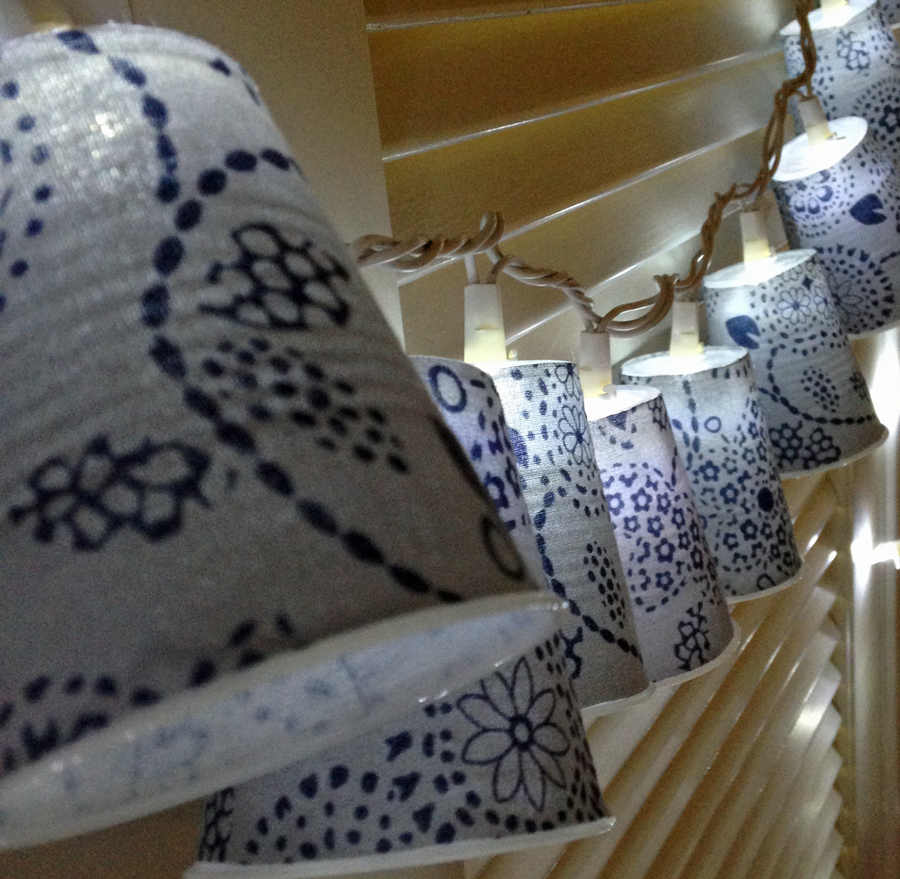
Shauna Krantz from Ella and Annie Magazine, is here with a fabric hanging lights DIY that can beautifully illuminate to any holiday or room.
I first saw these fabric lights on the Land of Nod blog and fell in love. I wanted to create a mini version for my daughter’s bedrooms, the perfect night lights for bedtime: pretty, fun and enchanting.
They would add an extra special touch to your outdoor porch, balcony, or even fireplace mantel! Simple supplies, affordable to create, and fun for you and the kids! The fabric you choose can change with the seasons or coordinate with your home decor.
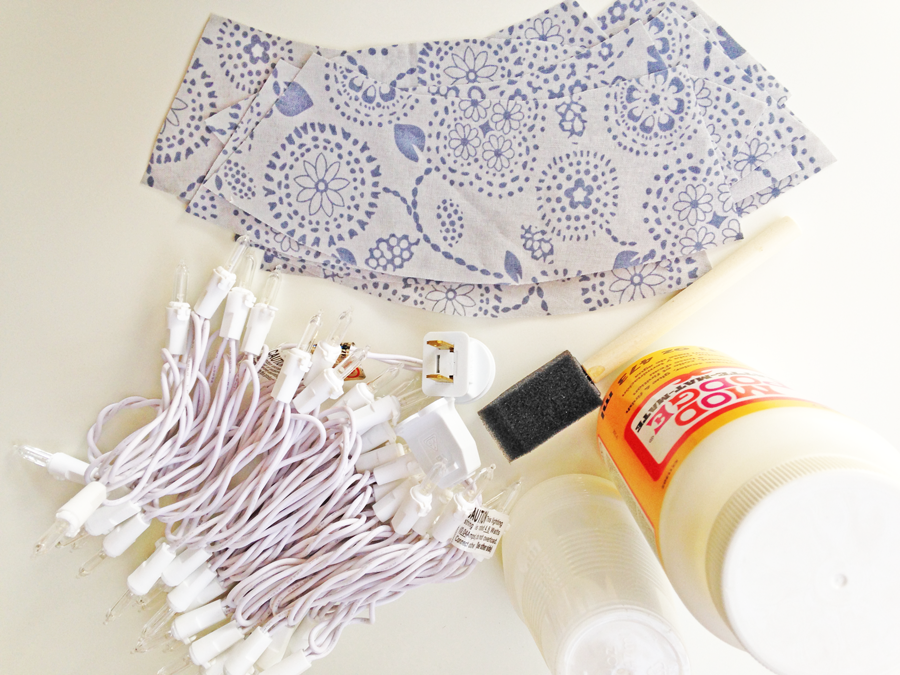
Supplies:
- Set of 50 mini LED lights (this is 12.5 ft, but you can make as long as you like)
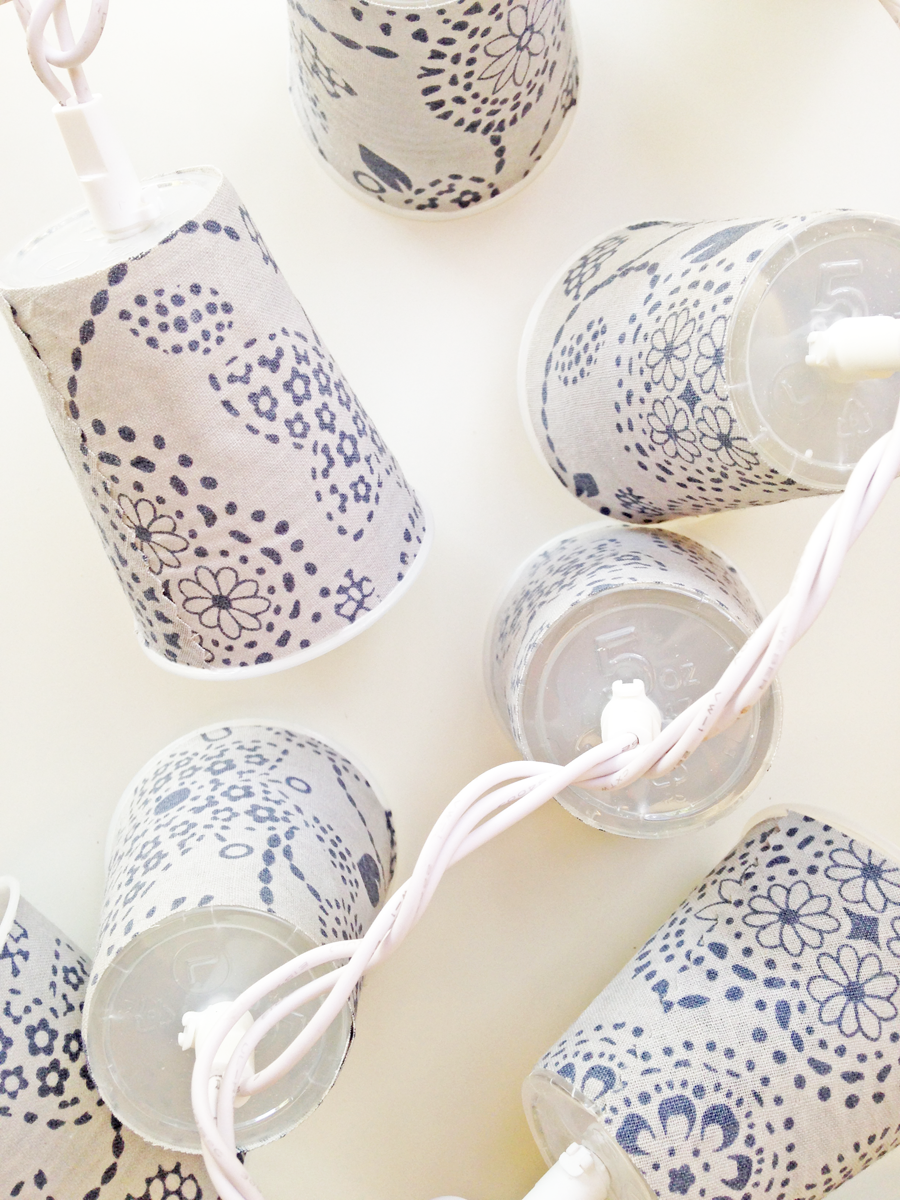
- 5 oz clear white plastic cups ( I got the great value brand at Walmart, set of 80)
- Mod Podge
- Foam paint brush
- Template
- Fabric
- Drill
- Template
Directions:

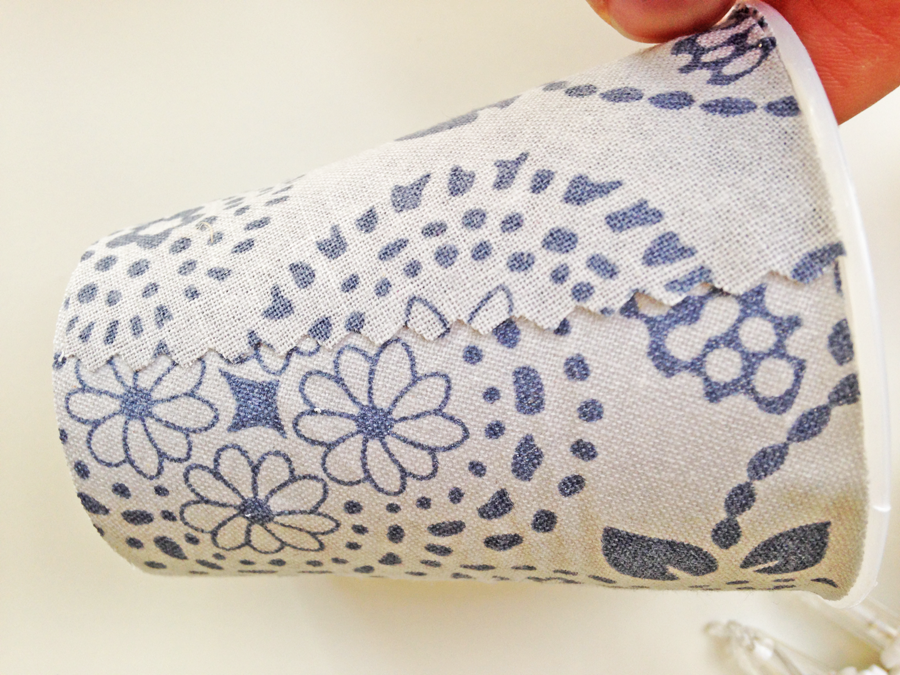
Begin by printing the template. Cut template out and trace onto fabric. I use pencil and trace lightly the shape of the template. Depending on how many lights you bought that will be how many fabric shapes you cut out. I believe you can buy a strand of as little as 25 lights. I bought 50 which will be about 12 ½ feet of lights. Trim one end of each fabric piece with pinking shears. This will prevent the fabric from fraying.

Cut out desired amount of fabric shapes. Set aside. Grab your drill. Using a drill bit slightly smaller than the light, drill a hole in the center of the bottom of the cups. I stacked 10 + cups at a time and then drilled through the stack. See video:
[iframe http://www.youtube.com/embed/_NVdxA512TM 540 405]
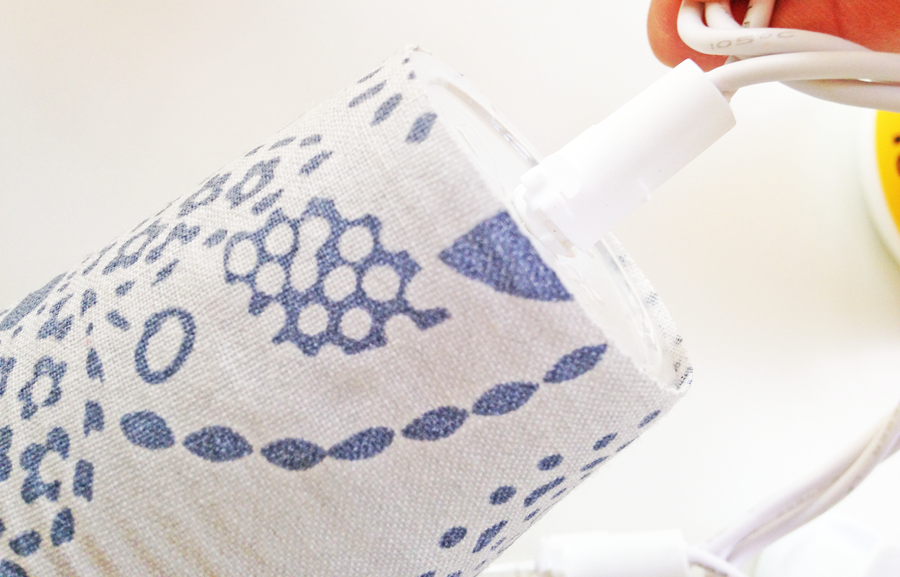
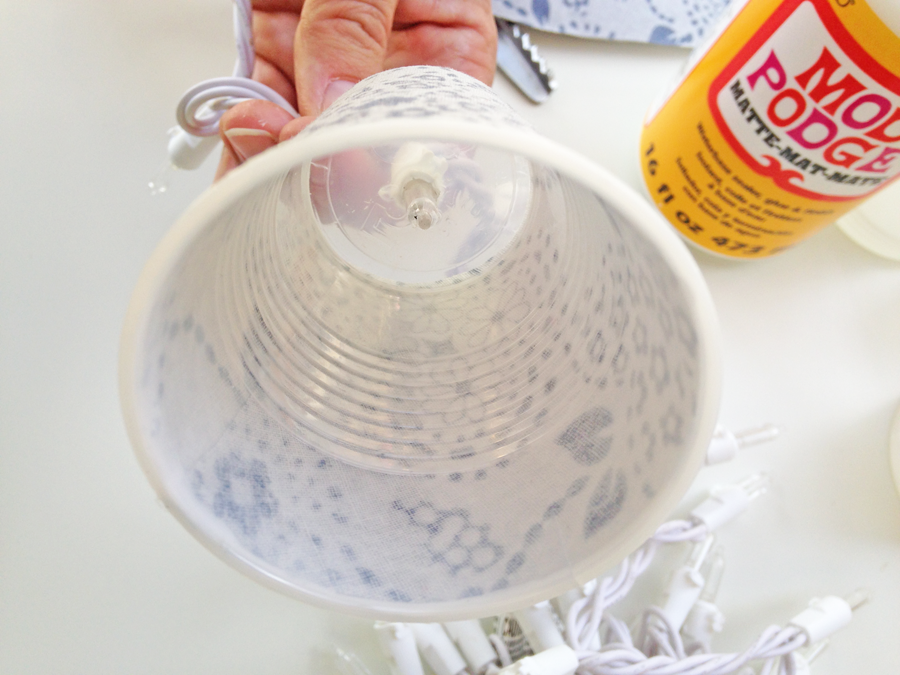
Separate cups. Using foam paint brush. Brush the Mod Podge onto the entire cup except for rim and bottom. Working quickly apply first fabric piece, slowly working your way around cup. Wipe off excess glue. See video
[iframe http://www.youtube.com/embed/aXPoAUFlXtg 540 405]
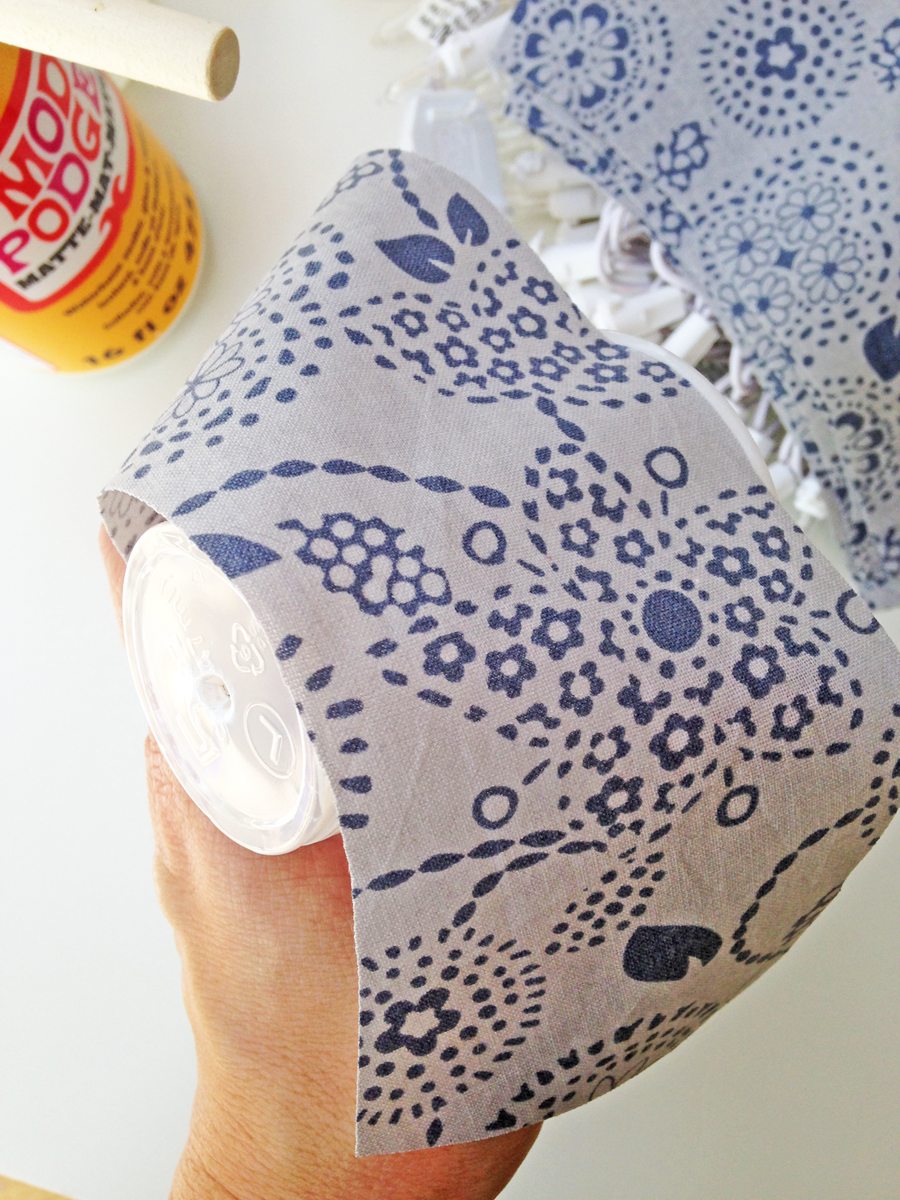

Repeat with all cups and fabric pieces. Allow fabric to dry at least 20-30 minutes.
Attach lights to cups. Place one hand inside of cup for resistance. Gently twist light through drill hole being careful not to crack the cups. See video:
[iframe http://www.youtube.com/embed/aguPDUgB2oI 540 405]
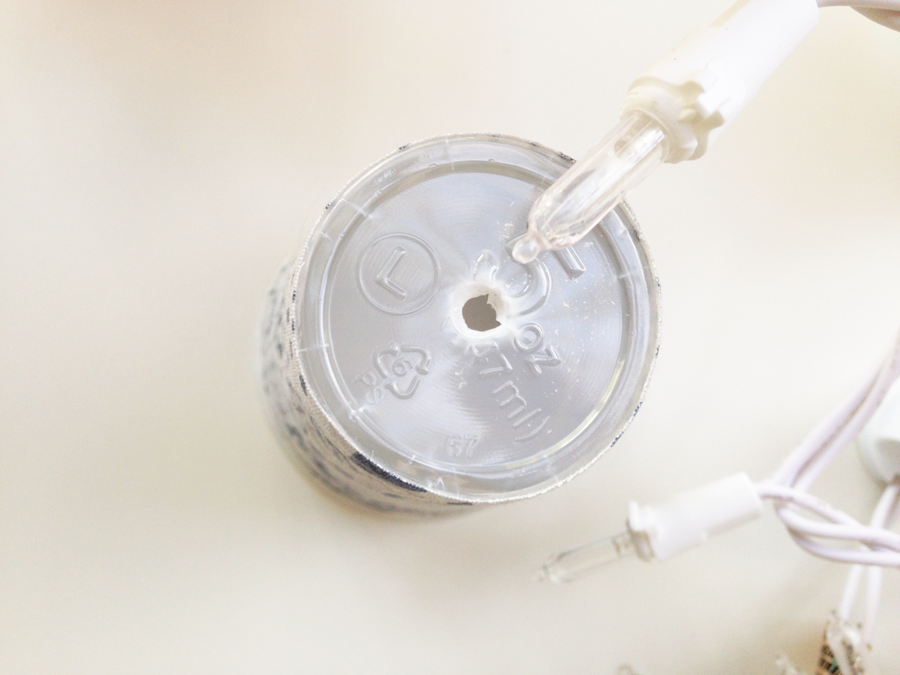
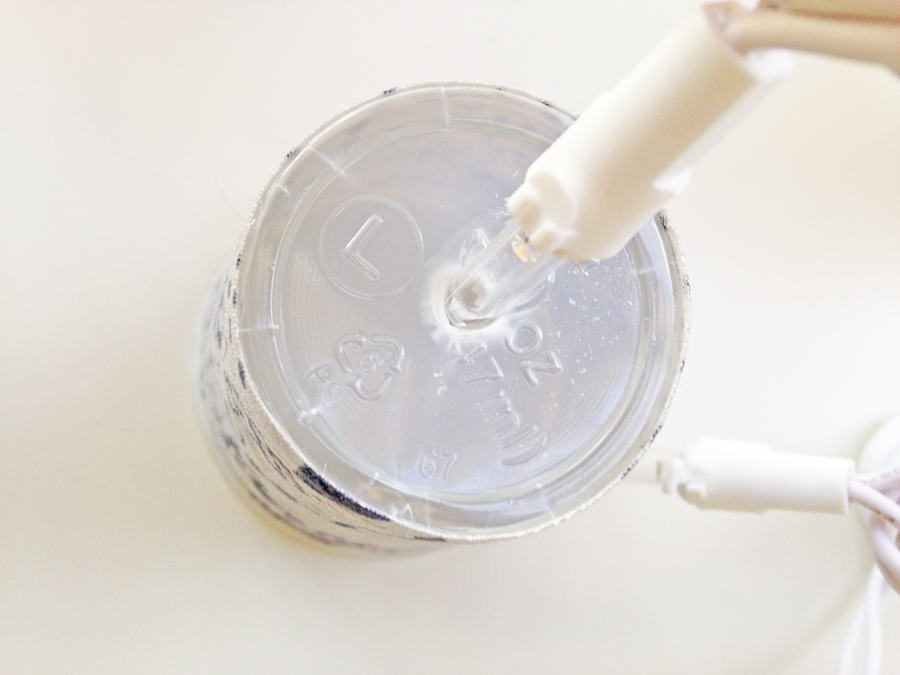
Note: if you make your drill holes too large the cups will just fall off. If you make the drill holes too small the lights will crack the cups.
Now hang those beautiful lights!

Thanks, Shauna, for such a sweet craft! To see more of Shauna’s work, check out Ella and Annie Magazine and visit them on Facebook, Twitter, Instagram, and Pinterest.
Please Note: Do not leave the lights unattended or on for extended use. All children should be supervised in the crafting process and when lights are in use. Best to have an adult do the drilling step in the process.
add your comment
To leave a comment Log in -or- Join the party